Side Splits – Exploring the Secrets, Progression and Benefits
Whether your goal is to activate your hips, hamstrings, or quad muscles, side splits are a good exercise to consider.
Most people who execute it do not know how to do side spits properly. Some are unaware of the differences between side splits stretches and other types of splits. This affects their workout goals and leads to poor results.
In this article, we will cover why side splits are important, a guide on the progression of side splits, and tips to speed up your side split exercise. We will also cover secrets to do side splits safely, equipment that can help to improve your side splits, and answers to a few frequent questions.
Side splits, also known as center splits or box splits, are performed by sliding out the legs to the left and right of the torso when sitting on the ground. To attain full side splits, your thighs need to be flat on the floor.

Why Is Side Splits Important for Your Happy or Healthy Life?
Performing splits helps to improve your joint health, muscle strength, blood circulation, balance, mobility, flexibility, and overall quality of life. Balance reduces the risk of injury and helps to promote the lives of elderly and younger people. Falls are among the leading cause of death in older adults.
By improving muscle strength, blood circulation, and motor control, splits help to prevent health issues such as cardiovascular and Parkinson’s diseases.
Progression of the Side Splits (Step-By-Step Guide)
Before starting side splits, it’s important to focus on stretching and strengthening the adductors, hip flexors, hamstrings, and groin muscles. These muscles will prepare your body for the demanding nature of side splits.
A study examining the chronic effect of static stretching exercises on muscle strength and power shows that regular static stretching exercises may improve muscular strength and power in healthy adults.
Another study shows that pre-participation stretching reduces the risk of muscle strains.

Stretches to Help Prepare Your Body for Side Splits
Before doing stretches, it’s advisable to do a warmup. Performing stretches without warmup can increase your chances of injury, making stretching more difficult because of your body’s stiffness.
You can do a warmup, such as yoga or a jog, for 4 – 10 minutes. Performing a warmup enhances blood circulation around your body. As your temperature increases, your body’s mobility will improve. This makes stretches easier and more effective.
A study investigating the effect of vibration devices on forward split flexibility and pain perception in young male gymnasts reveals that vibration improves split range of motion over stretching alone, but did affect pressure to pain perception in stretched or unstretched muscles.
Another study examining the effects of whole-body vibration on flexibility reveals that the usage of whole-body vibration platforms improves flexibility in both male and female artistic gymnastics.
Here are examples of stretches for side splits:
1. Runners Stretch
Runners’ stretch is also called half-seated splits in yoga. Because of its impact on hip flexors and hamstring flexibility, runners’ stretch is part of many cooldown and warmup exercises.
To perform it:
- Begin with a low lunge position, place your right foot forward and your hands around your foot to offer support.
- Position your left knee down to the floor.
- When moving your hands back, move your hips back, pointing your left heel and extending your right leg.
- Pause in this position for 20 to 30 seconds or as long as possible. Ensure your breath
- Change legs and repeat the procedure.
2. Standing Forward Pose
Standing forward pose is another stretch to improve your hamstring flexibility.
Here are the steps to perform it:
- Stand on your feet, placing your feet and arms by your sides.
- Lift your arms up over your head while facing up.
- With your arms spreading wide, breathe out, stimulate your core, and swan dive over your legs with a straight back.
- Considering your flexibility, attempt placing your hands on the floor a little in front of you or beside your feet. Ensure every part of your feet is in contact with the floor.
- Maintain the position and breathe.
- Stay in the position for 20 to 30 seconds or an extended time if possible.
3. Deep Side Lunge
Deep side lunge is a good stretch that engages your quadriceps, adductor muscles, and hips. This boosts your inner thigh flexibility and helps lower your body during side splits.
To perform it:
- Begin with standing on your feet.
- Move into a side lunge to the right with your knees positioned in a direct manner over your ankle.
- Keep your left hand on the floor. Using your right hand, push your knees out. You should experience the effect of the stretch in the right hip flexor and internal left thigh.
- Maintain the pose for 20 – 30 seconds. Move your hands onto the other side, and repeat the procedure 2 – 3 on both sides.
4. Half Pigeon Pose
Half Pigeon is a stretch that engages the hip muscles and improves mobility to prepare for side splits.
To perform it:
- Begin with the downward-facing dog. Then, move your right foot toward your right wrist, and move your knee and shin to the mat.
- Flatten the left leg behind.
- Confirm if the right knee is positioned in a straight line with your right hip. Move the foot.
- Move your hands forward.
- Bend your forehead to the mat, and square your hips.
- Maintain this position for 20 to 30 seconds or an extended time if possible.
How to Do Side Splits
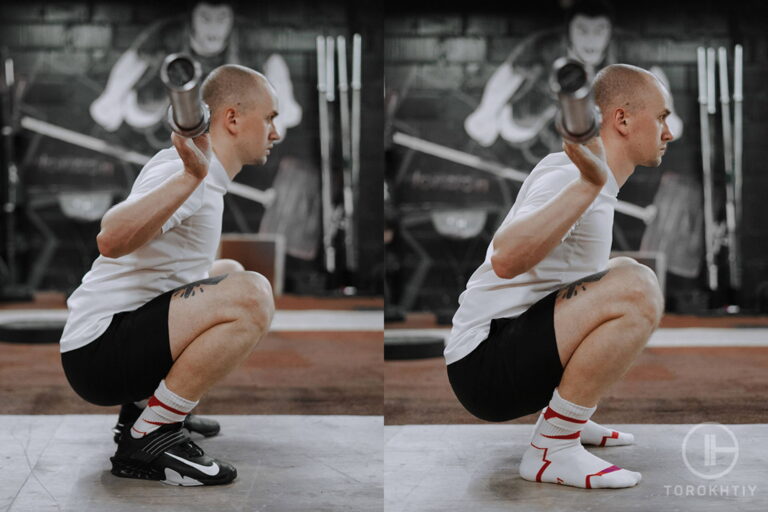
The goal in side splits is to stretch each leg with your torso elongated and upright. Wearing stocks will make your slide easier. You can use yoga blocks if you’re unable to reach the ground. A full side split involves getting your inner thighs flat on the ground.
Here are the steps to do side splits:
- Sit in an upright manner with your back against the wall. Keep your torso as elongated as possible, ensuring your pelvis or hips aren’t rotating.
- Confirm if your lower and mid back are flat to the wall.
- Slowly slide your legs outwards as long as possible to both sides, using the ground to maintain support in front of you.
- Maintain the pose for 20 – 30 seconds while breathing.
How Fast I Can Do the Side Splits?
Since people are built differently, the amount of time it takes to do side splits varies between individuals. The speed of doing side splits also depends on your fitness levels and previous movement history.
For example, professional athletes such as gymnasts, dancers, and martial artists who have already trained their bodies to master a wide range of motion can do splits in 4 to 6 weeks.
For non-athletes, there’s no time frame. Flexible people can learn to master side splits faster than those who are not flexible.

A study reveals that the duration and frequency of stretches alter the flexibility of the hamstring muscles.
Another study suggests that three weeks of stretching improves tolerance to the discomfort associated with stretching.
However, it may take years of active stretching to master side splits.
Here are some tips to keep in mind:
1. Incorporate Stretches Into Your Workout Routine
By incorporating stretches into your workout, you’re preparing your body to do side splits. Stretches help to improve the flexibility and mobility of your muscles.
2. Practice Stretches Consistently
Before mastering side splits, you need to develop a certain level of mobility and flexibility. You can only achieve it by practicing stretches consistently.
3. Avoid Overstretching or Pushing Yourself Past Your Limit
Overstretching or forcing your body to do side splits will only do more harm than good.
Side splits are not a competition where the faster person wins, so don’t treat it like one. Before achieving your side split goals, you need to be patient and take it slowly. In addition, you need to practice consistently and work on your flexibility before attempting the full move.
4. Consult With Your Physician if You Have Concerns, Pain, or Injury
While improving your mobility and flexibility through stretching, it’s vital to reach out to a physician if you experience pain or discomfort. The professionals are there to assist you in navigating through the journey. Don’t be afraid to ask for assistance if you need it.
Secrets to Do Side Splits Safely
When planning to do side splits, it’s crucial to prioritize safety first before anything else. Disregarding safety rules will strain your muscles, slow your progress, and reduce your chances of achieving side splits. You will spend more time in the treatment room than out there, building up flexibility and mobility.
Here are some secrets to doing side splits safely:
1. Avoid Overstretching
Many people are tempted to overstretch their muscles to achieve side splits faster than their peers. However, over-stretching will only hinder your progress. Therefore, go at your own pace, and ensure you follow guidelines so you don’t feel pain.
2. Follow the Guidelines
It’s important to always follow the guidelines. One of these guidelines is to avoid bouncing during stretching exercises because it causes unnecessary joint and muscle stress.
Endeavor to engage core muscles because they help stabilize your upper body and help limit the chances of injuries.
Also, do not practice placing your feet on an elevated surface if you haven’t mastered performing side splits on the ground. This is wrong and will only result in injuries.

3. Consult With a Physician if You Notice Anything
It’s advisable to contact a physician if you experience pain during your workout sessions. Many people make the mistake of continuing their workout routine in pain.
Prevention is always better than cure. The physician will diagnose and recommend solutions if you have any problems. You can also reach out to them if you have concerns or questions.
4. Wear the Right Clothes
It’s important to wear the right clothes during your stretching routine. Wearing the right clothes will allow you to move your body properly while stretching. You can put on something elastic or baggy.
To aid your feet to slide easily on the ground, you can wear socks.
5. Don’t Let Anyone Push You Into Side Splits
To speed up the process of doing side splits, many people request assistance from their friends or partner to help push themselves into side splits. This doesn’t seem right because side splits require control and patience.

Equipment That Can Help to Improve Your Side Splits
Since side splits are demanding and require patience, many people have opted for pieces of equipment to enhance their flexibility and speed up the process of mastering side splits.
Here are some pieces of equipment to help improve your side splits:
1. Yoga Blocks
Yoga blocks provide length, alignment, and support for athletes to try different Yoga positions. With a yoga block, it’s easier for athletes to make stretching moves correctly.
2. Resistance Bands
Resistance bands help to engage and strengthen your leg, hip, and hamstring muscles. This reduces the risk of injuries. In addition, resistance bands aid in performing side splits by training your muscles.
3. Exercise Mat
These types of equipment are essential for hard surfaces or floors. Stretching on hard surfaces will give you bruises and make your workout routine uncomfortable and frustrating.
Before purchasing an exercise mat, ensure it’s thick enough to give some padding from the floor but not too thick so you can’t feel the floor beneath.
🔻21-DAY SPLIT CHALLENGE
Unleash your flexibility potential with our progressive 21-day training program.
This program will help you to:
- ✅ Achieve a Perfect Split
✅ Boost Hip Mobility
✅ Sculpt Aesthetic and Sexy Legs
✅ Banish Stiffness
✅ Enhance Mental Confidence
☀️ Specially designed for you by a Cirque du Soleil artist, use it!
FAQ
Can Anyone Learn Side Splits?
Anyone can learn side splits with consistent practice and dedication. However, people who are more flexible can learn side splits faster than those who are not.
Are Middle or Side Splits Easier?
Although the side splits require only a few muscles to be stretched, many people find it difficult because of the tight nature of the inner thighs and hip flexors.
Conclusion
Mastering Side splits takes time and depends on the flexibility of your muscles. It also requires dedication and consistent practice. Before attempting side splits, it’s vital to perform warmups and stretching exercises to open up and prepare your muscles.
Runner’s stretch, standing forward pose, deep side lunge, half pigeon pose are examples of stretches to prepare your body for side splits.
Side splits enhances joint health, balance, muscular strength, and overall quality of life.
Have you mastered side splits? How long did it take you? Which is your favorite stretching exercise? How frequently do you do stretches? Share your thoughts in the comments.
Also read:
- How Long Does It Take To Be Able to Do the Splits
- How to Do the Middle Splits
- Benefits of Splits
- Front Splits
- Stretch Exercise for Splits
- How to Learn the Splits in 30 Days
- Front Splits
References:
- Chronic Effects of Static Stretching Exercises on Muscle Strength and Power in Healthy Individuals Across the Lifespan: A Systematic Review with Multi-level Meta-analysis // Springer: https://link.springer.com/ article/10.1007/s40279-022-01806-9
- To stretch or not to stretch: the role of stretching in injury prevention and performance // NCBI: https://pubmed.ncbi.nlm.nih.gov /20030776/
- Effect of vibration on forward split flexibility and pain perception in young male gymnasts // NCBI: https://pubmed.ncbi.nlm.nih.gov/ 19223672/
- Whole-Body Vibration Effects on Flexibility in Artistic Gymnastics-A Systematic Review // NCBI: https://pubmed.ncbi.nlm.nih.gov/ 35630012/
- The effect of time and frequency of static stretching on flexibility of the hamstring muscles // NCBI: https://pubmed.ncbi.nlm.nih.gov/ 9327823/
- Stretch exercises increase tolerance to stretch in patients with chronic musculoskeletal pain: a randomized controlled trial // NCBI: https://pubmed.ncbi.nlm.nih.gov/ 19696119/
Why Trust Us?
With over 20 years in Olympic Weightlifting, our team does its best to provide the audience with ultimate support and meet the needs and requirements of advanced athletes and professional lifters, as well as people who strive to open new opportunities and develop their physical capabilities with us.
By trusting the recommendations of our certified experts in coaching, nutrition, dietology, and sports training programming, as well as scientific consultants, and physiotherapists, we provide you with thorough, well-considered, and scientifically proven content. All the information given in the articles concerning workout programming, separate exercises, and athletic performance, in general, is based on verified data. We ensure that you can rely on our professionals’ pieces of advice and recommendations that can be treated as personalized ones which will benefit you and fully meet your needs.
The product testing process is described in more detail here
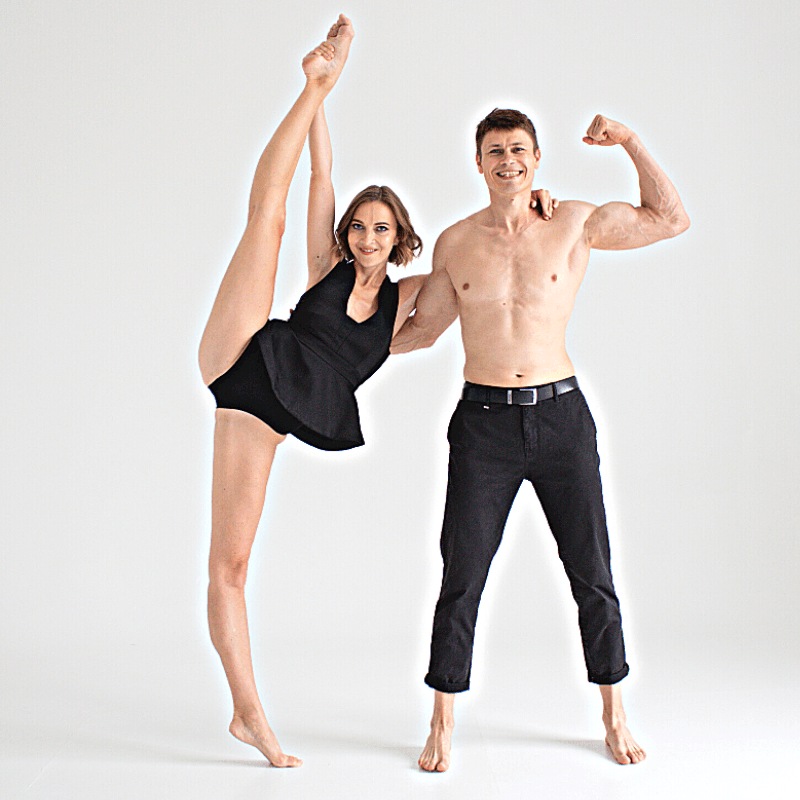
Author: Oleksiy Kononov
Former Cirque Du Soleil Artist
Ukrainian Gymnast
More than 25 years ago Oleksiy started his sports career. He major in gymnastics which is definitely not an easy sport to go in for!
To become an athletic champion (in Ukraine, for instance, we mean here the title of “Master of Sports”) in gymnastics, one needs to spend at least 10 years and start training no later than being six years old. As for Oleksiy, he has fulfilled all the criteria.
During this period of time, definitely not short, he managed to become:
- Master of Sports, Champion of the State and International Tournaments;
- Member of the national team of Ukraine, having a perfect opportunity to train the best team ever!
- Part of Cirque Du Soleil team (as an artist).